

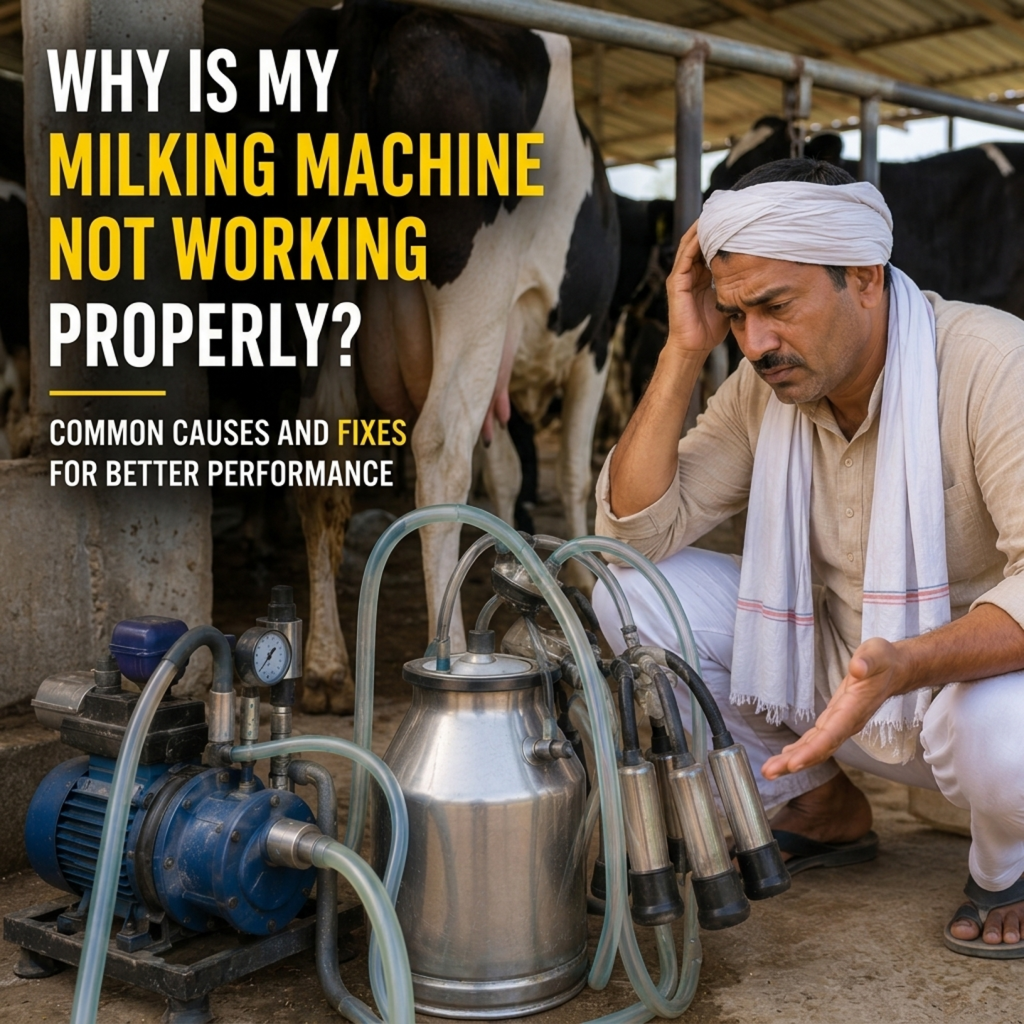
Milking machine problems are commonly caused by vacuum leaks, blocked milk lines, worn teat liners, damaged pulsators, incorrect vacuum settings, poor maintenance, or worn-out components. Identifying the root cause early can help maintain milk quality, improve milking efficiency, and prevent animal discomfort.
A milking machine is the heart of any dairy operation. When it stops working properly, the impact is immediate lower milk yield, stressed animals, and potential udder health problems. Even a small drop in vacuum pressure or a worn teat liner can slow down milk flow, cause incomplete milking, or increase the risk of mastitis. Understanding why your milking machine is underperforming is the first step to fixing it quickly and preventing costly downtime.
This guide covers the most common milking machine problems, their causes, step-by-step troubleshooting, and a maintenance checklist to keep your equipment running at peak performance.
Quick Troubleshooting Table
| Problem | Possible Cause | Recommended Fix |
| Low milk flow | Vacuum leak or blocked milk line | Check hoses, clean milk lines, inspect filters |
| Teat cups falling off | Low vacuum or worn liners | Adjust vacuum level, replace teat liners |
| Vacuum pressure fluctuations | Air leak, faulty pulsator | Inspect all connections, service pulsator |
| Excessive machine noise | Vacuum pump wear or loose components | Lubricate pump, tighten fittings |
| Milk leakage | Cracked hoses or damaged gaskets | Replace damaged rubber parts immediately |
| Slow milking process | Low vacuum, worn liners, or cow stress | Check vacuum setting, warm up udder before milking |
| Incomplete milk extraction | Pulsator malfunction or incorrect settings | Calibrate pulsation rate, check liner condition |
How Does a Milking Machine Work?
Before troubleshooting, it helps to understand the basic working principle of a milking machine. A milking machine uses a controlled vacuum to stimulate and extract milk from the cow’s udder. The four main components are:
- Vacuum pump: Generates the negative air pressure (vacuum) that drives milk extraction.
- Pulsator: Alternates between vacuum and atmospheric pressure to mimic the natural sucking and release rhythm of a calf. This prevents teat damage and encourages milk letdown.
- Teat cups and liners: The rubber liner inside the metal shell collapses rhythmically against the teat to massage it. A worn or hardened liner reduces milking efficiency significantly.
- Milk collection system: A network of milk hoses, a receiver jar, and a milk pump that collects and transfers milk to the bulk milk cooler.
Any disruption in this system from the pump to the liner can reduce performance, cause animal discomfort, or lower milk quality.
Common Reasons a Milking Machine Is Not Working Properly
1. Vacuum Leak
Symptoms: Teat cups falling off, reduced vacuum reading, machine working harder than usual.
Cause: Cracks in hoses, loose fittings, worn gaskets, or damaged connections allow air to enter the system.
Fix: Run the machine and listen for hissing sounds. Inspect all rubber hoses, clamps, and joints. Replace any damaged components and re-test vacuum levels.
2. Blocked Milk Lines
Symptoms: Slow milk flow, milk backing up in teat cups, incomplete milking.
Cause: Milk residue, fat deposits, or foreign matter can block narrow milk lines and reduce flow.
Fix: Follow a strict CIP (Clean-in-Place) routine after every milking session. Check and clean strainers and filters regularly.
3. Worn Teat Liners
Symptoms: Poor milking performance, teat cup slippage, teat end damage, increased mastitis risk.
Cause: Rubber liners harden, crack, or lose elasticity after extended use. Most liners should be replaced every 2,500 milkings or every 3 months.
Fix: Keep a replacement log. Replace all four liners in a unit at the same time for consistent performance.
4. Pulsator Malfunction
Symptoms: Uneven milking, teat damage, reduced milk yield, teat cups squeezing too hard.
Cause: Dirty pulsator air filters, worn diaphragm, or clogged pulsator vents disrupt the pulsation cycle.
Fix: Clean pulsator air filters weekly. Test pulsation rate and ratio using a pulsator analyser. Replace faulty pulsator diaphragms.
5. Incorrect Vacuum Pressure
Symptoms: Teat cups falling off (too low), teat congestion or damage (too high), slow milking.
Cause: Vacuum settings not calibrated to the correct level for your system or animal size.
Fix: Recommended vacuum level is 42-50 kPa for most dairy cows. Use a vacuum gauge to verify and adjust as needed.
6. Vacuum Pump Problems
Symptoms: Low vacuum reading, inconsistent vacuum, noisy operation.
Cause: Worn pump vanes, low oil level, dirty air filter, or motor issues reduce pump capacity over time.
Fix: Check and change oil regularly. Clean or replace air filters. Inspect vanes annually and replace if worn.
7. Cracked Hoses or Pipes
Symptoms: Air leaks, vacuum loss, milk contamination.
Cause: UV exposure, age, or mechanical stress can crack rubber and plastic hoses.
Fix: Inspect all hoses visually during weekly maintenance. Replace brittle or cracked hoses immediately.
8. Dirty Components
Symptoms: High bacterial count in milk, off-flavours, increased somatic cell count.
Cause: Inadequate cleaning allows biofilm and bacteria to build up inside milk contact surfaces.
Fix: Follow a validated CIP protocol: pre-rinse with lukewarm water, hot alkaline wash, acid rinse, and final sanitise before milking.
9. Electrical Problems
Symptoms: Machine not starting, motor running slowly, vacuum fluctuations.
Cause: Loose wiring, tripped circuit breaker, faulty motor capacitor, or unstable power supply.
Fix: Check power supply voltage, inspect all electrical connections, and call a qualified technician for motor faults.
10. Poor Maintenance Practices
Symptoms: Recurring problems, premature component failure, increased repair costs.
Cause: Skipping routine servicing, delayed part replacements, and inadequate operator training.
Fix: Implement a structured maintenance schedule (see checklist below) and train all milking staff properly
Symptoms and What They Mean
| Symptom | Likely Cause | Severity | Recommended Action |
| Teat cups slipping off | Low vacuum / worn liners | High | Adjust vacuum; replace liners |
| Milk not flowing | Blocked line / very low vacuum | Critical | Check lines and vacuum pump immediately |
| Machine making loud noise | Pump wear / loose parts | Medium | Lubricate pump; tighten all fittings |
| Vacuum dropping during milking | Air leak / pump overloaded | High | Inspect seals and hoses; check pump capacity |
| Milk contamination | Dirty equipment / cracked hoses | Critical | Deep clean system; replace cracked components |
| Cow discomfort or kicking | High vacuum / pulsator fault | High | Reduce vacuum; service pulsator |
| Uneven milking between quarters | Liner wear / pulsator imbalance | Medium | Replace liners; test and calibrate pulsation |
Why Is My Milking Machine Losing Vacuum?
Low or dropping vacuum is one of the most common milking machine problems. It is almost always caused by an air leak somewhere in the system.
Common causes include:
- Air leaks at hose connections, cracked liners, or loose clamps
- Damaged or worn gaskets between machine components
- Vacuum pump vanes worn down, reducing pump capacity
- Partially blocked vacuum line reducing airflow
Troubleshooting steps:
- Check the vacuum gauge during operation — it should remain stable.
- Run your hand along all hose connections while the machine is running to feel for air movement.
- Inspect all rubber components for cracks or hardening.
- Check the vacuum pump oil level and condition.
- Clean or replace the vacuum pump air filter.
- If the problem persists, have the pump serviced by a technician.
Why Are the Teat Cups Falling Off?
Teat cups falling off mid-milking is a sign that vacuum is insufficient, the liner is worn, or the milk flow has stopped. Specific causes include:
- Vacuum level below the recommended 42-50 kPa range
- Worn or hardened teat liners that no longer seal properly
- Incorrect milking technique — poor teat preparation reduces let-down response
- Damaged rubber shells or cracked short milk tubes
- Pulsation cycle too slow, reducing stimulation and milk flow
Fix: Check vacuum setting first. Replace liners if they have exceeded their recommended milking count. Ensure teats are stimulated properly before cup attachment.
Why Is Milk Flow Slow During Milking?
Slow milking extends the time cows spend in the parlour, increases labour costs, and risks over-milking. Common causes include:
- Low vacuum pressure reducing suction force
- Blocked or partially blocked milk lines restricting flow
- Worn teat liners with reduced flexibility
- Inadequate teat preparation — cows that are not properly stimulated have poor let-down
- Very cold weather causing milk to thicken in lines
- High somatic cell count cows milking slowly due to udder inflammation
Example: A dairy farm in Punjab noticed milking time increasing by 20% in winter. Inspection revealed a partially blocked long milk tube that had not been cleaned properly. After a deep CIP cycle, milking times returned to normal within two days.
How to Troubleshoot a Milking Machine Step by Step
- Check the power supply: Confirm the machine is receiving correct voltage. Check the circuit breaker and motor starter.
- Inspect the vacuum gauge: Turn on the machine without attaching teat cups. Vacuum should reach the set level within 60 seconds and stay stable.
- Check all hoses and connections: Visually inspect every rubber hose, connector, and clamp. Look for cracks, looseness, or visible wear.
- Inspect the pulsator: Remove and clean the pulsator air filter. Listen for irregular clicking sounds. Test pulsation rate with a pulsation analyser if available.
- Examine the teat liners: Check the bore diameter and surface texture. Replace if the liner has completed its recommended service life.
- Check the milk lines: Flush milk lines with water and check for blockages. Clean strainers and receiver filters.
- Verify the cleaning system: Check detergent dosing, water temperature, and CIP cycle completion logs.
- Test the vacuum pump: Check oil level, air filter cleanliness, and listen for abnormal sounds. Measure vacuum pump capacity if performance remains low.
Milking Machine Maintenance Checklist
| Frequency | Task |
| Daily | Run full CIP cleaning cycle after every milking |
| Daily | Check and record vacuum gauge reading |
| Daily | Inspect teat cups and liners for visible damage |
| Daily | Drain and rinse receiver jar and milk pump |
| Weekly | Clean pulsator air filters |
| Weekly | Inspect all rubber hoses and connections |
| Weekly | Check vacuum pump oil level |
| Weekly | Clean vacuum pipeline filter |
| Monthly | Test pulsation rate and ratio on all units |
| Monthly | Check milk meters and flow indicators |
| Monthly | Inspect electrical connections and motor performance |
| Annually | Full service by qualified dairy equipment technician |
| Annually | Replace vacuum pump vanes if worn |
| Annually | Pressure test entire vacuum system |
When Should Milking Machine Parts Be Replaced?
| Part | Typical Replacement Interval | Signs of Wear |
| Teat liners | Every 2,500 milkings or 3 months | Hardening, cracking, discolouration, rough bore surface |
| Rubber short milk tubes | Every 6 months | Cracks, stiffness, milky residue that won’t clean |
| Long milk hoses | Every 12 months or as needed | Discolouration, cracking, kinking |
| Gaskets and O-rings | Every 12 months | Flattening, cracking, leaks at joints |
| Pulsator diaphragm | Every 2 years or per manufacturer | Irregular pulsation sound or pattern |
| Vacuum pump vanes | Every 3-5 years | Reduced vacuum capacity, increased noise |
| Milk pump impeller | Every 3-5 years | Reduced flow, vibration, noise |
How Poor Milking Machine Performance Affects Dairy Farms
- Reduced milk yield: Even a 10% reduction in vacuum efficiency can lower milk output per cow per session.
- Mastitis risk: Irregular pulsation and over-milking damage teat ends, creating entry points for bacteria. Treatment costs and discarded milk from mastitis can run into thousands of rupees per case.
- Cow stress: Improper milking causes discomfort and may make cows reluctant to enter the parlour, reducing throughput.
- Milk quality penalties: High somatic cell counts or bacterial counts due to dirty equipment can result in price reductions from dairy processors.
- Increased operating costs: Frequent repairs caused by deferred maintenance are consistently more expensive than preventive servicing.
- Equipment downtime: A machine failure during peak milking disrupts the entire operation and stresses animals whose milking schedule is disrupted.
How Professional Dairy Farms Prevent Milking Machine Problems
- Schedule preventive maintenance every 6 months minimum — do not wait for a breakdown.
- Keep a maintenance log with dates, vacuum readings, and part replacement records.
- Train every milking operator on correct attachment technique, teat preparation, and machine checks.
- Install a vacuum recorder or datalogger to identify irregular vacuum patterns before they cause animal health issues.
- Stock critical spare parts — liners, gaskets, short milk tubes — so replacements can be made without delay.
- Calibrate pulsation annually and after any major repair.
- Use manufacturer-approved detergents and CIP chemicals at correct concentrations.
Frequently Asked Questions
Why is my milking machine not extracting milk?
The most common causes are a vacuum leak, a blocked milk line, or worn teat liners. Start by checking the vacuum gauge if it is below the set level, trace the leak in hoses and connections. If vacuum is normal, inspect the liners and clear any blockages in the milk lines.
What causes low vacuum in a milking machine?
Low vacuum is usually caused by an air leak (cracked hoses, loose fittings, damaged gaskets) or a worn vacuum pump. Dirty air filters on the pump can also restrict airflow and reduce vacuum. Inspect the entire system starting from the vacuum gauge, then trace backward toward the pump.
How often should teat liners be replaced?
Teat liners should be replaced every 2,500 milkings per unit, or every 3 months whichever comes first. Worn liners harden and lose flexibility, reducing milking efficiency and increasing mastitis risk. Replace all four liners in a cluster simultaneously for consistent performance.
Why are teat cups slipping off?
Teat cups slip when vacuum pressure is too low, when teat liners are worn and cannot maintain a seal, or when the cow’s milk let-down response is poor. Check the vacuum setting, inspect liner condition, and ensure teats are properly prepared and stimulated before cup attachment.
How do I know if my pulsator is faulty?
Signs of a faulty pulsator include uneven milking between quarters, teat damage, an irregular clicking sound, and slow milk flow. Remove and clean the pulsator air filter. Use a pulsation analyser to test the pulsation rate and ratio. If readings are outside the recommended range, service or replace the pulsator.
Why is my milking machine making noise?
Unusual noise usually comes from the vacuum pump (worn vanes or low oil), a loose component vibrating during operation, or air being forced through a partial blockage. Lubricate the pump, tighten all fittings, and check hoses for kinks or obstructions. Persistent noise warrants a full technician inspection.
Can a vacuum leak affect milk production?
Yes. A vacuum leak reduces suction efficiency, slows milking, causes teat cups to fall off, and can lead to incomplete milking. Over time, inconsistent vacuum increases the risk of teat damage and mastitis, which directly reduces milk yield. Even a small undetected leak can reduce farm productivity noticeably.
How often should milking equipment be serviced?
Milking equipment should receive a full professional service at least once a year, with interim checks every 6 months. Daily operator checks, weekly hose and pulsator filter inspections, and monthly vacuum testing are also essential. Dairy farms with larger herds or older equipment may require more frequent servicing.
What is the ideal vacuum level for a milking machine?
The recommended vacuum level for most milking machines used with dairy cows is 42 to 50 kPa (approximately 12.5 to 15 inches of mercury). The exact setting depends on the machine type and the animal. Always refer to the manufacturer’s specifications and verify with a calibrated vacuum gauge.
When should I call a technician?
Call a qualified dairy equipment technician if vacuum loss persists after checking hoses and filters, if the vacuum pump is noisy or failing to reach the set level, if pulsation rates are consistently abnormal, or if electrical faults are suspected. Attempting to service motors, pumps, or electrical systems without proper training can be dangerous.
Why is my milking machine losing suction?
Milking machines lose suction due to air leaks in rubber hoses, loose connections, worn gaskets, or a vacuum pump that has lost capacity through wear. Check all hose joints and connections first, then assess the pump condition. A vacuum gauge reading below the set level confirms the problem.
Can worn liners reduce milk yield?
Yes. Worn teat liners have a harder bore surface, reduced flexibility, and poor elasticity. This reduces the massaging action on the teat, slows milk extraction, and can cause incomplete milking. Studies from dairy research institutions suggest that replacing liners on schedule can improve milk yield by 3 to 8% per cow.
How do I test milking machine vacuum pressure?
Connect a calibrated vacuum gauge to the vacuum line as close to the milking point as possible. Start the machine without attaching teat cups and allow it to stabilise for 60 seconds. The reading should match the set vacuum level (typically 42-50 kPa). Test again during milking — vacuum should remain stable with minimal fluctuation.
What causes incomplete milking?
Incomplete milking is most often caused by a pulsation fault, worn teat liners, or cows being stressed or rushed. Low vacuum and incorrect cup attachment can also leave milk in the udder. Residual milk increases mastitis risk and signals to the cow’s body to reduce future production.
How can I improve milking machine efficiency?
Replace teat liners on schedule, maintain vacuum at the correct level, service the pulsator regularly, clean equipment thoroughly after every milking, train operators on correct technique, and conduct annual professional servicing. Consistency in milking routine also improves cow let-down response and increases efficiency.
What maintenance does a milking machine require?
Daily CIP cleaning, daily vacuum gauge checks, weekly pulsator filter cleaning, weekly hose inspection, monthly pulsation testing, and annual professional servicing. Keeping a maintenance log helps track component replacement intervals and ensures nothing is missed.
Expert Tips for Better Milking Machine Performance
- Replace teat liners on a fixed schedule — log the milking count for each unit.
- Never ignore minor vacuum fluctuations — they are early warnings of larger problems.
- Clean equipment immediately after milking — do not allow milk residue to dry inside lines.
- Inspect rubber hoses weekly for hairline cracks, especially at connection points.
- Monitor pulsator performance with a pulsation analyser at least once a year.
- Train all milking staff on correct cup attachment, teat preparation, and machine checks.
- Conduct a full vacuum test after any repair or component replacement.
- Keep a stock of liners, gaskets, and short milk tubes so repairs are never delayed.
- Record and track vacuum readings over time — gradual drops indicate pump wear before failure occurs.
- Work with a qualified dairy equipment supplier to schedule preventive servicing, not just emergency repairs.
Conclusion
Most milking machine problems from low vacuum and slow milk flow to teat cup slippage and unusual noise have straightforward causes and practical solutions. The key is to catch problems early through regular checks rather than waiting for a complete breakdown.
A structured maintenance routine, timely liner replacement, correct vacuum settings, and proper CIP cleaning are the foundation of reliable milking machine performance. These basic practices protect milk quality, support udder health, and ensure consistent milk yields day after day.
If your milking machine is underperforming, the components you use matter more than anything else. Mahesh Eng. Works manufactures high-efficiency milking machines designed for Indian dairy conditions helping you milk faster, reduce teat damage, and maintain milk quality across every session. Get expert guidance on choosing the right capacity and configuration for your herd size and start improving performance from day one.

Mahesh Eng. Works
Written and reviewed by Mahesh Eng. Works, a dairy machinery manufacturer specializing in milk cream separator machines and hygienic stainless steel dairy equipment. Since 1980, we have been designing and manufacturing cream separators, butter churners, milk pasteurizers, bulk milk coolers, and complete dairy processing solutions for dairy farms, milk collection centers, and processing plants.